Windows 11 is a sleek, updated version of Windows 10, with new features and settings. It offers a plethora of tools to enhance productivity and make your computer feel more personalized. Microsoft is constantly refining and updating Windows 11.
In this article, we’ll explore 15+ tips and tricks to help you get the most out of Windows 11 in 2024
1. Realign the Start Button
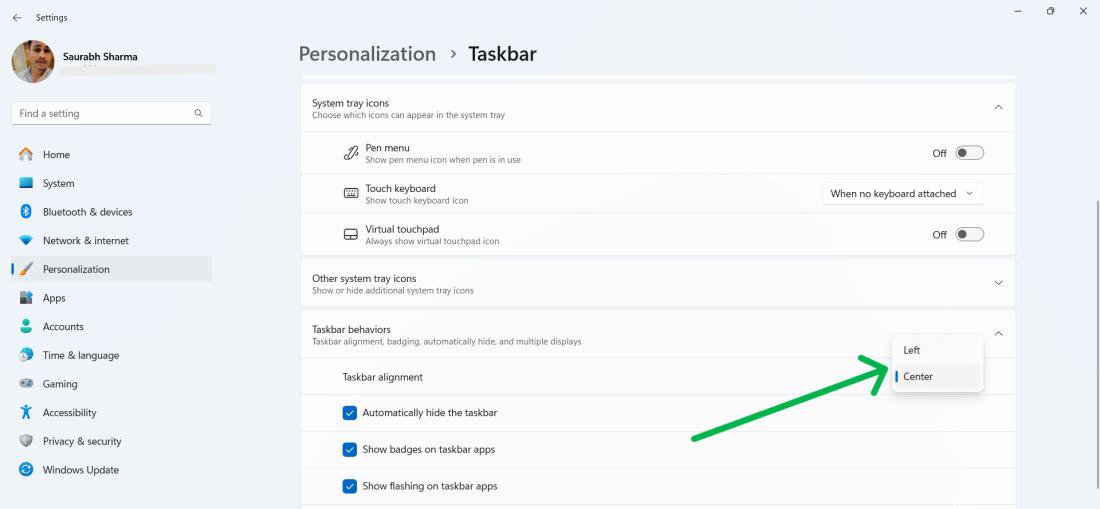
Customize the Start button’s position for easier access by right-clicking the taskbar and selecting “Taskbar settings.” Then, select the center or left from the “Taskbar alignment” dropdown menu option, or leave it according to your preference.
2. Snap Your Window Layouts
With its Snap Layouts Windows 11 will change the way you view your windows. The user friendly interface allows you drag and drop windows into any of the predefined layouts. These utilities improve the multitasking capabilities and keep the desktop ordered so as to ensure maximum productivity by avoiding any usability issue.
Step 1: Open any application
Step 2: Click on the square icon on the top
Step 3: Then from the many choose any layout

3. Generate Text and Images With Copilot
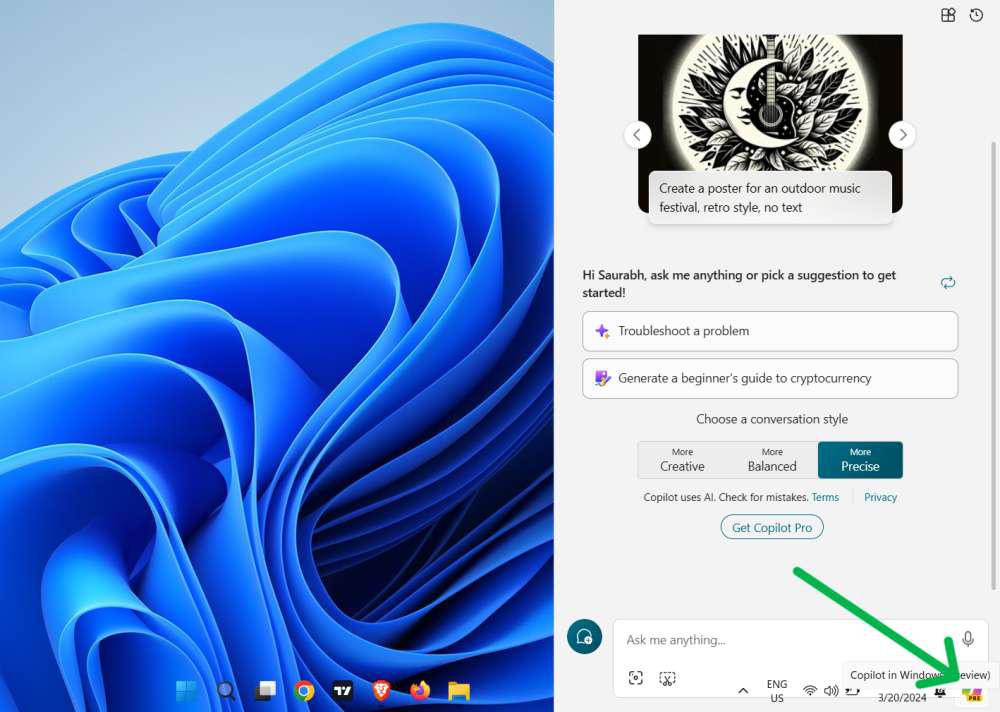
The Copilot feature in Windows 11, powered by AI, changes the game for content creation. It generates text and images on demand, transforming our approach to creative tasks and productivity.
Step 1: Access Copilot from the Start menu.
Step 2: Enter your request for text or images and let Copilot do the rest.
4. Customize the Quick Settings Panel
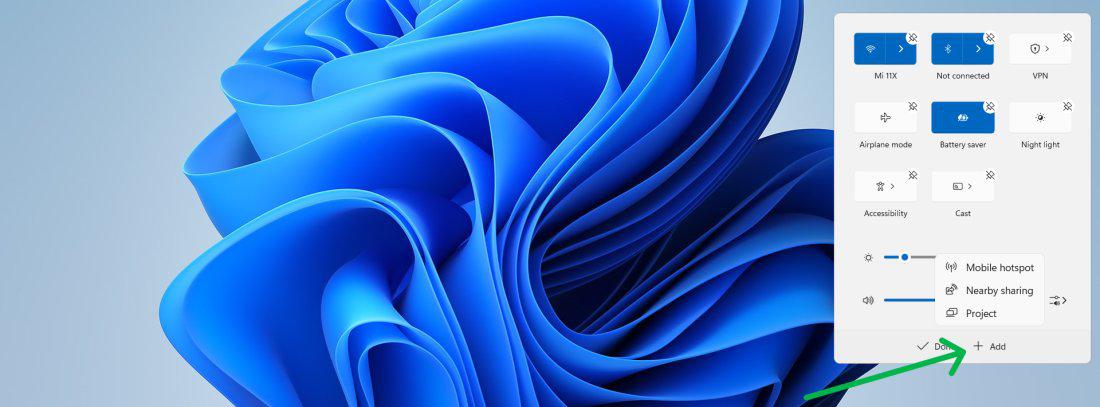
You can customize the Quick Settings Panel in Windows 11 to have a personalized and straightforward setting, which will ensure that the settings of your choice are there a-click-away.
Step 1: Click the network, sound, or battery icon on the taskbar.
Step 2: Click the pencil icon to edit and pin your preferred settings.
Step 3: Then, Click on the “Add” after adding preferred settings then click on the “Done” button
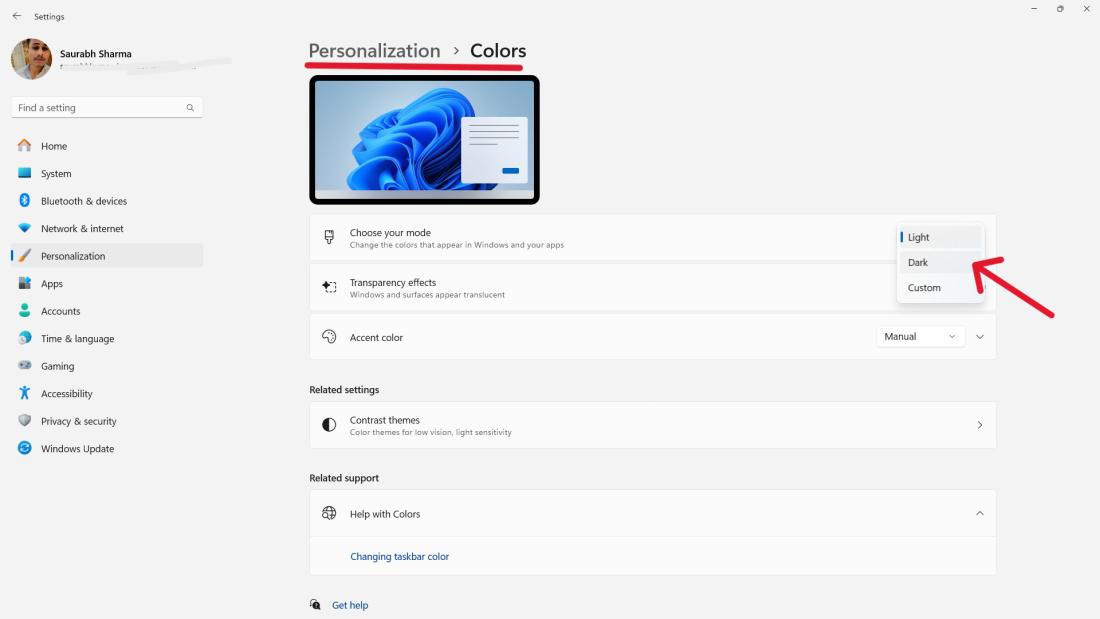
5. Enable Dark Mode for Eye Comfort
Dark Mode provides more than just aesthetic appeal; indeed, it is also a handy feature to minimize eye fatigue due to long periods of time in front of screens. By turning On Dark Mode in Windows 11, you can boost comfort and even help to achieve better sleep quality.
Step 1: Click on the ‘Start‘ button in the taskbar.
Step 2: Select “Settings” (gear-shaped icon) to open the Settings menu, or use shortcut Win + I to Open Settings.
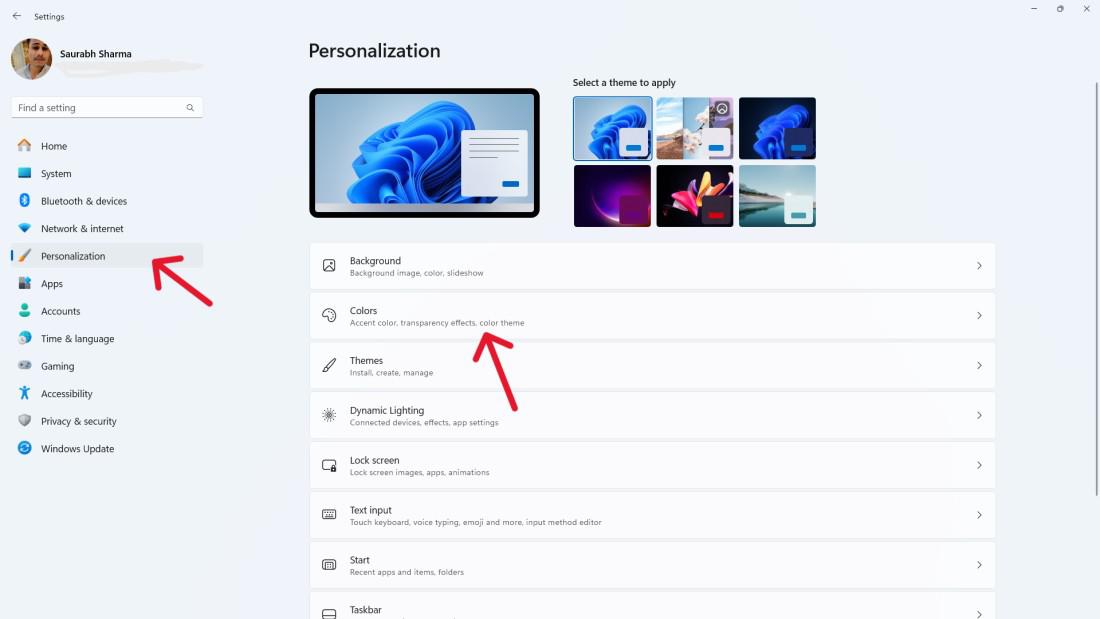
Step 3: Within the Settings, click on ‘Personalization.’
Step 4: In the right sidebar, choose ‘Colors.’
Step 5: On the ‘Choose your mode‘ dropdown menu.
Step 6: Select ‘Dark‘ to enable Dark Mode instantly.
6. Customize Widget Layout and Content
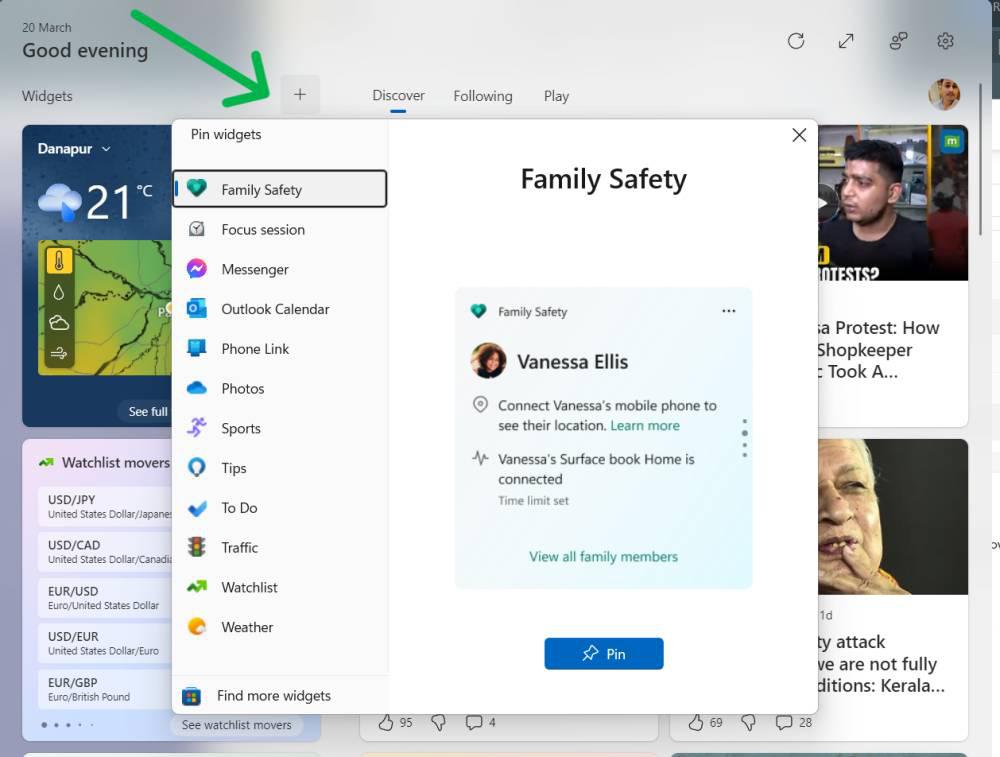
Customize Windows 11 widgets to display your preferred content, from weather updates to news, creating a personalized window to your world that keeps you informed and connected without cluttering your desktop.
Step 1: Open the Widget app by clicking the three small squares
Step 2: Click the Widget you want to move, drag it to the new location, then drop it there.
To add new widgets click on the top plus icon then from the list select any windgets
7. Connect Your Phone for Texts, Calls, and More
Windows 11’s Phone Link actively bridges the gap between your smartphone and PC. When you connect your phone, it allows you to conveniently manage texts, calls, and notifications directly from your desktop.
Step 1: Open the Widgets panel from the taskbar.
Step 2: After opening application select android or iPhone
Step 3: Then, Scan the the QR code
Step 4: Give required permission
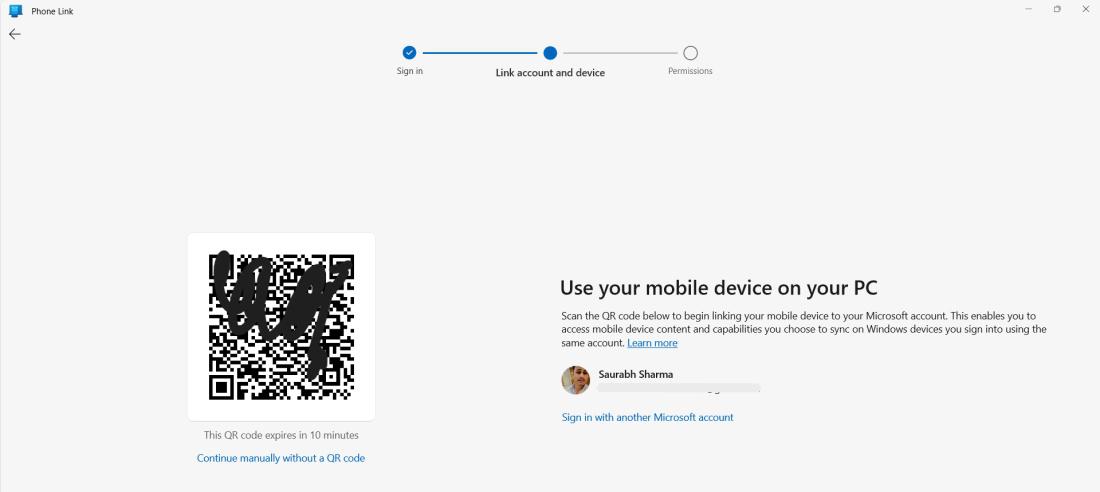
Before connect make sure that you have installed the phone link application from play store or app store on your phone
8. Increase Security by Using Passkeys
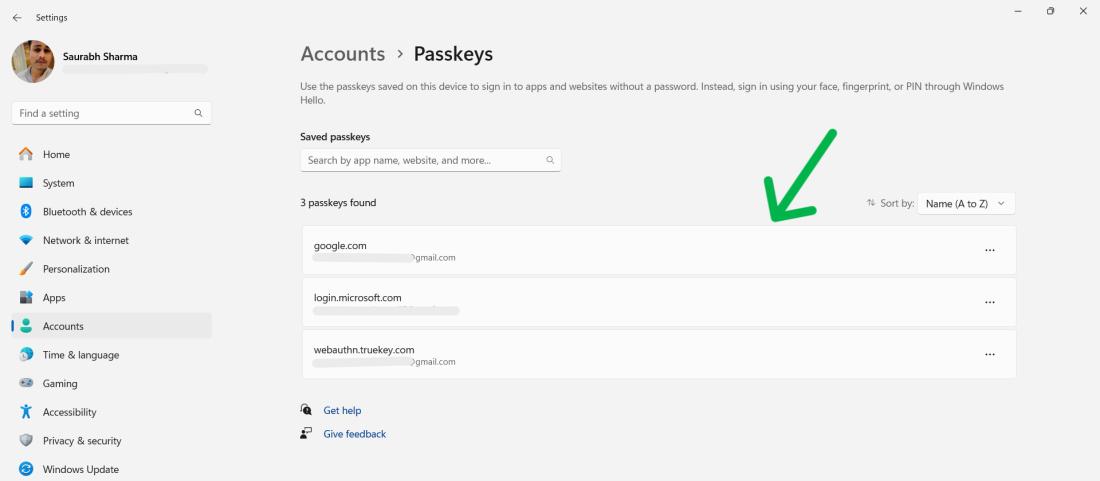
Windows 11’s Passkeys, offering a robust alternative to traditional passwords, ensure digital security in an era where it is paramount. This feature, leveraging biometric authentication, provides a secure and user-friendly method to protect your data.
Step 1: Go to ‘Settings’ > ‘Accounts’ > ‘Passkey Settings’.
Step 2: Set up a Passkey following the on-screen instructions.
9. Use Focus Sessions
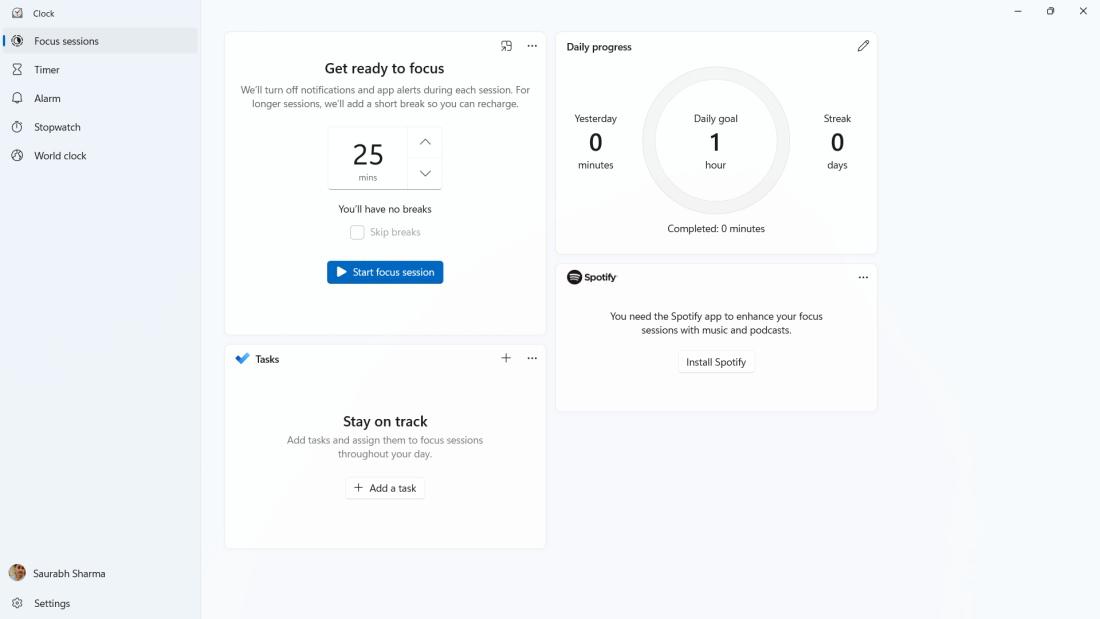
Windows 11’s Focus Sessions minimize your distractions in order to ensure maximum dedication to the current task, thus allowing you to fully concentrate and become significantly more productive.
Step 1: Open the Clock app and select ‘Focus Sessions’.
Step 2: Set a timer and work without interruptions
10. Add Tabs to File Explorer
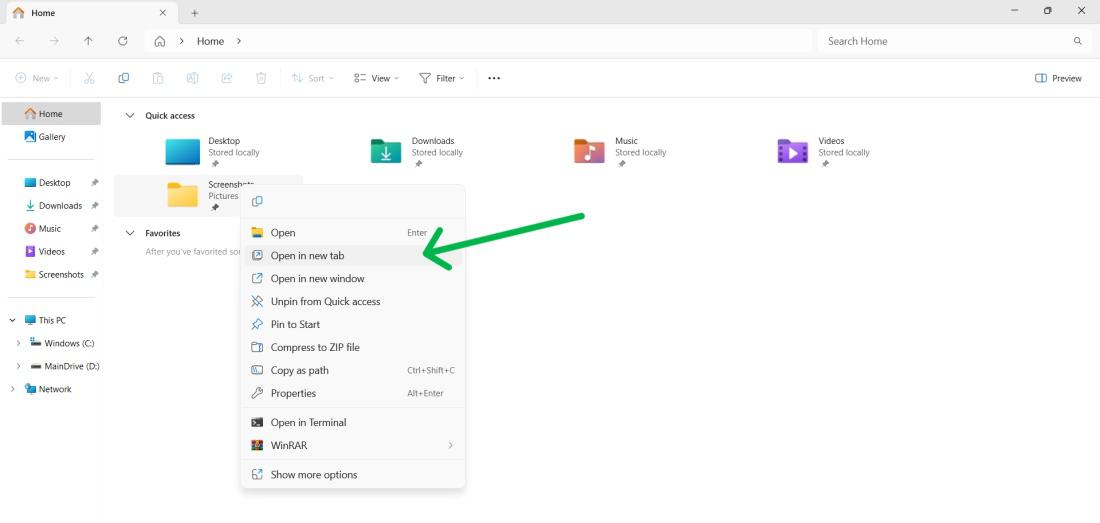
Adding tabs to File Explorer in Windows 11 subtly yet significantly changes the experience. It simplifies file management by enabling navigation across multiple directories within a single window.
Step 1: Open File Explorer and right-click a folder.
Step 2: Select ‘Open in new tab’.
11. Change the Default Apps
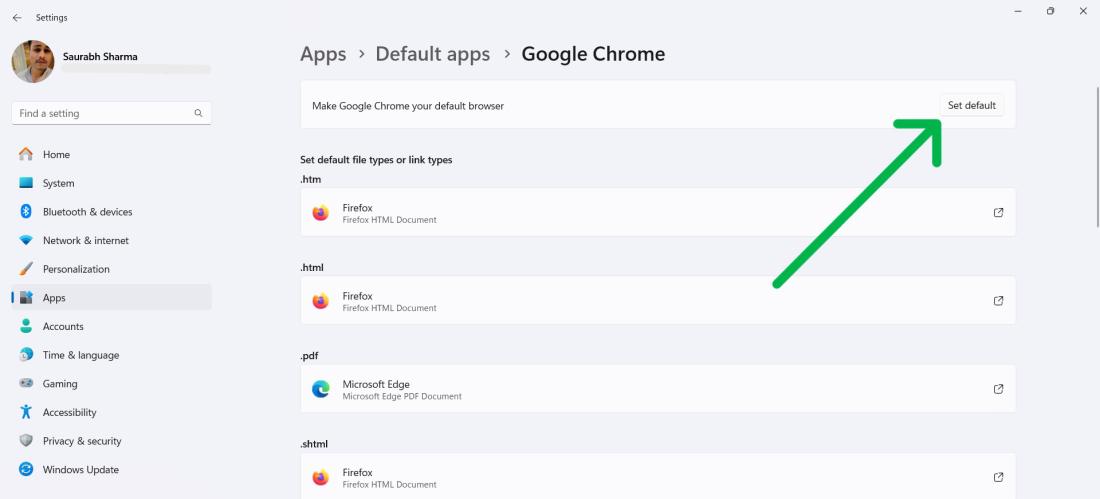
Set your preferred applications as default in Windows 11 to determine which programs open your files. This customization streamlines your workflow by consistently using your chosen software for specific tasks.
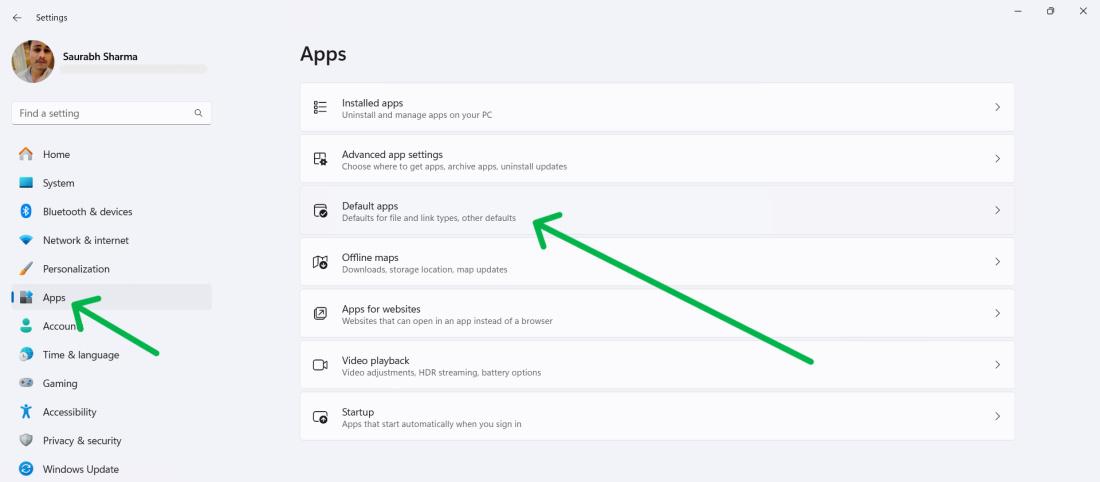
Step 1: Press Windows Key + I or search for “Settings” in the Start menu.
Step 2: Select “Apps” from the left-hand menu.
Step 3: Click “Default apps” in the main window.
Step 4: Scroll down and find your preferred application, then click on it.
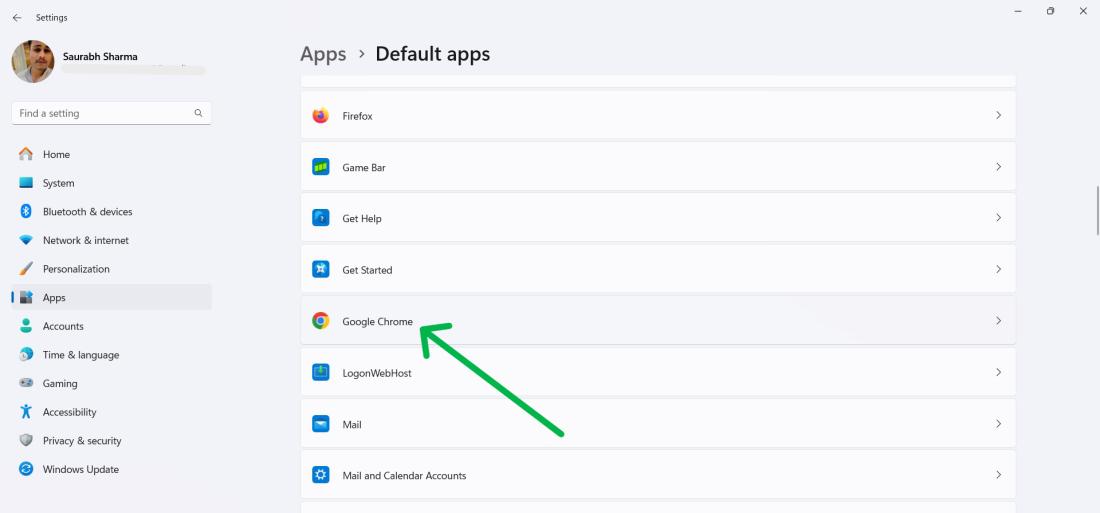
Step 5: Click “Set default” next to your chosen applications
12. Learn New Keyboard Shortcuts
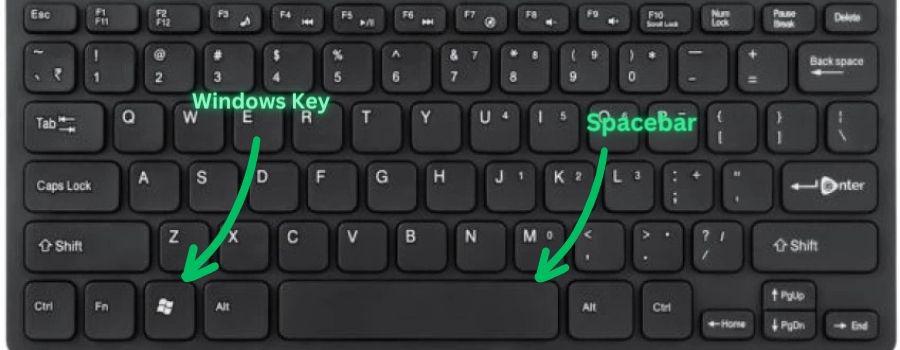
Mastering keyboard shortcuts in Windows 11 can significantly speed up your workflow. These shortcuts provide quick access to various features and functions, which saves time and boosts productivity.
- Win + A: Open Quick Settings.
- Win + B: Focus on hidden icons.
- Win + C: Open Teams Chat.
- Win + Ctrl + C: Toggle Color Filters.
- Win + G: Open Xbox Game Bar.
- Win + L: Lock PC or switch accounts.
- Win + M: Minimize all windows.
- Win + Shift + M: Restore all windows.
- Win + N: Open Notification Center and Calendar.
- Windows + Z: To access Snap Layouts
13. Employ File Recovery with File History
File History in Windows 11 acts as a safety net for your data, backing up your files to protect them from accidental deletion and ensuring that your important documents are always recoverable.
Check out this guide to use file history features: Backup & Restore Files using Windows File History
14. Virtual Desktop Shortcuts
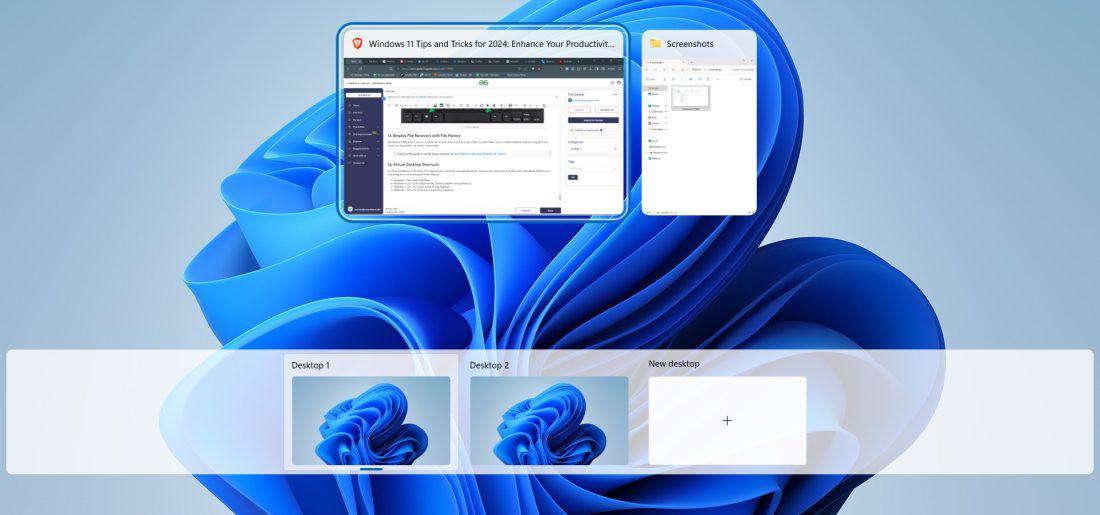
Use Virtual Desktops in Windows 11 to segment your work into manageable areas. Improve your organizational skills and multitasking efficiency by mastering shortcuts to navigate these desktops.
- Windows + Tab: Open Task View.
- Windows + Ctrl + Left or Right Arrow: Switch between virtual desktops.
- Windows + Ctrl + D: Create a new Virtual Desktop.
- Windows + Ctrl + F4: Close the current virtual desktop
15. Change Virtual Desktop Background
Personalize the background of each Virtual Desktop in Windows 11 to visually distinguish between different workspaces. This customization aids in organization and makes switching between tasks more intuitive.
Step 1: Press Windows Key + Tab to open task view
Step 2: Right click on desktop then select “Choose background”

16. Use the Text-to-Speech feature
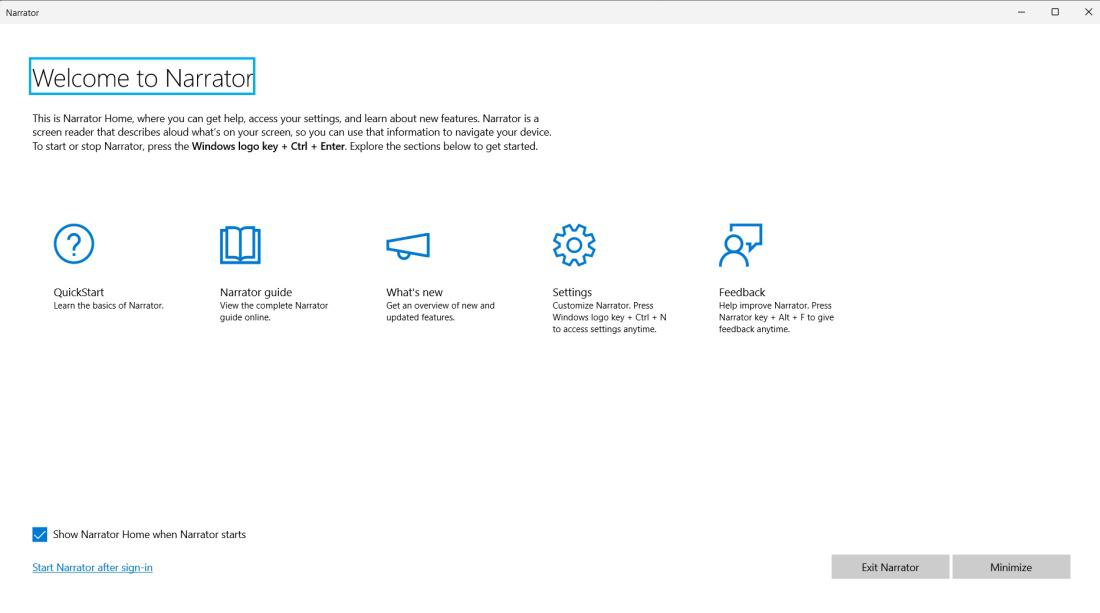
The Text-to-Speech feature in Windows 11 reads aloud text from any document or webpage, serving as a valuable aid for auditory learners or those with visual impairments.
Step 1: Highlight the text you want to be read aloud.
Step 2: Press ‘Ctrl + Win + Enter’ to start the narration.
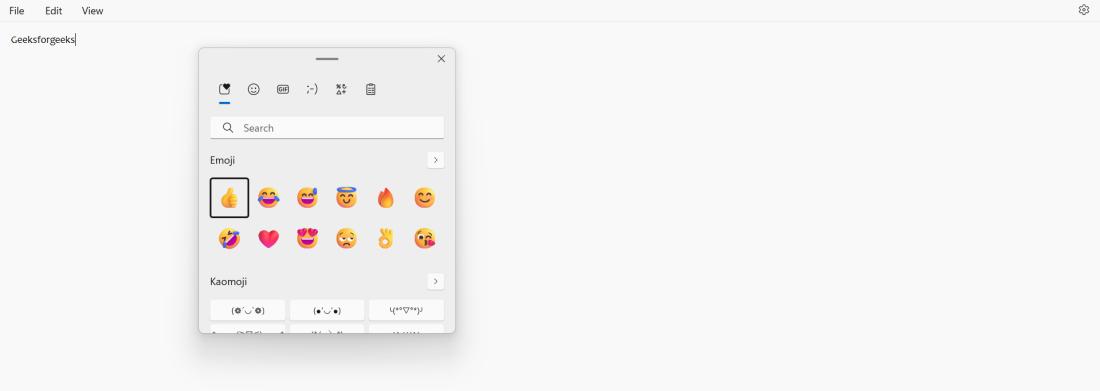
17. Use Emoji with Ease with the built-in Emoji Picker
Emojis add personality to digital communications, and with a few keystrokes, you can easily express yourself using Windows 11’s built-in Emoji Picker, which enriches your messaging and documents
To use built-in emoji picker press Windows key + > (dot button)
Conclusion
In Conclusion, Incorporate Windows 11 tips and tricks into your daily routine to boost productivity and streamline your workflow. Customize your taskbar, master keyboard shortcuts, and use AI-powered features like Copilot for smarter, not harder work. Adapt these tips to fit your needs and elevate your productivity.


